
TigerDesigner is our powerful design tool used for creating Fully Editable Documents. It enables you to produce visually appealing and professional content by utilising a variety of panel types, such as Text, Image, and Lists.
Fully Editable designs provide you with complete creative control, making it essential to explore this section thoroughly to understand how to navigate and use TigerDesigner effectively.
Left-hand menu
This menu offers a variety of features to enhance your experience in TigerDesigner. Below, you will find detailed explanations of each section, highlighting their functions and how they can help you creating amazing interactive content.

1. Home
Select the Home icon to leave TigerDesigner and go back to the Document Management screen. Three options are available:
- Cancel
Not ready to go? Simply select Cancel to go back to your design. - Exit
Leave TigerDesigner without exporting your changes. Don't worry, they will still be saved and available when you next open TigerDesigner! - Update Document
Export your changes to pull through the latest changes so they can be seen when you view your document outside of TigerDesigner.

Recommended reading - Saving and Exiting.
2. Document Tools
-
Grid Settings
Control the spacing and visibility of the gridlines on each page.
Gridlines help you to accurately position the panels and interactive elements on your page, contributing to a polished and professional look.
- Select a Default Branding
Select your organisation's branding to enable easy access to the corresponding fonts and colours in the Panel and Interactivity settings.
Applying a branding makes it quicker and more efficient to create on brand documents. Read more about Branding and Fully Editable Documents.
3. Inventory Tools
- Inventory
Your inventory is as a central repository for all images that can be used in the design of your document. All users in your account have access to the same inventory.
Upload your own files or download them from the Getty Stock Library for free. Read more about how to use the Inventory.
-
Upload Fonts
Maintain brand consistency in your documents by uploading your organisations fonts. Ensure that any font you upload is a .TTF file, then use them in a Text, Story or List panel.
You must be sure that you have the correct licensing when uploading a font file.
-
Upload Images/Stock Library
A convenient shortcut to upload an image or search the Stock Library. -
Checkout
Your account comes with unlimited content tokens, however, stock images will still need to be 'purchased' using the Checkout option. This will ensure they are full resolution and free from watermarks. -
Resources Manager
Organise and manage the files used in the interactivity of your document, such as videos or imagery for a More Information pop-up box. You can upload files to a specific version or document, making it available to use in all versions within it. - Data Resources Manager
Manage the spreadsheet files used in the Charting module to present your data in an engaging and visually appealing way.
Recommended reading - Charting Module.
4. Designer Interface Options
Control the look and feel of TigerDesigner, making it a more personal experience for you and your colleagues.
- Designer Theme Colour
Select between Light Mode and Dark Mode based on your individual needs and preferences.
The brightness of a Light theme can enhance mood and creativity, whereas a Dark theme can help reduce eye strain.
- Panel Highlight Colour
Select which colour you would like to show when you hover over a panel on a page.
- Module Highlight/Snap Guide Colour
Choose which colour is used for gridlines and the interactivity in your document.
Think about the design of your document and which colours you will be using - if your design is primarily blue, opt for a contrasting highlight colour, such as orange.
- Tooltip Mode
Tooltips appear in the bottom right-hand corner of TigerDesigner, offering valuable information about the section you are working on. You can customise their behaviour by selecting whether you want them to always display, show on hover or remain hidden.
5. Export to PDF
Export and download a PDF copy of the design of your document. You have the flexibility to choose the spread type and resolution, allowing you to select the settings that best meet your needs.
The PDF file will contain the design of your document and does not include interactivity. Please note that any interactive elements require an internet connection to function.
6. Help/Live Chat
Looking for support, help or guidance using PageTiger? Visit our user guide or chat to us using our online messenger.
Tabs
Different tabs are located at the top of TigerDesigner, which modify the available options and actions you can perform on your document.
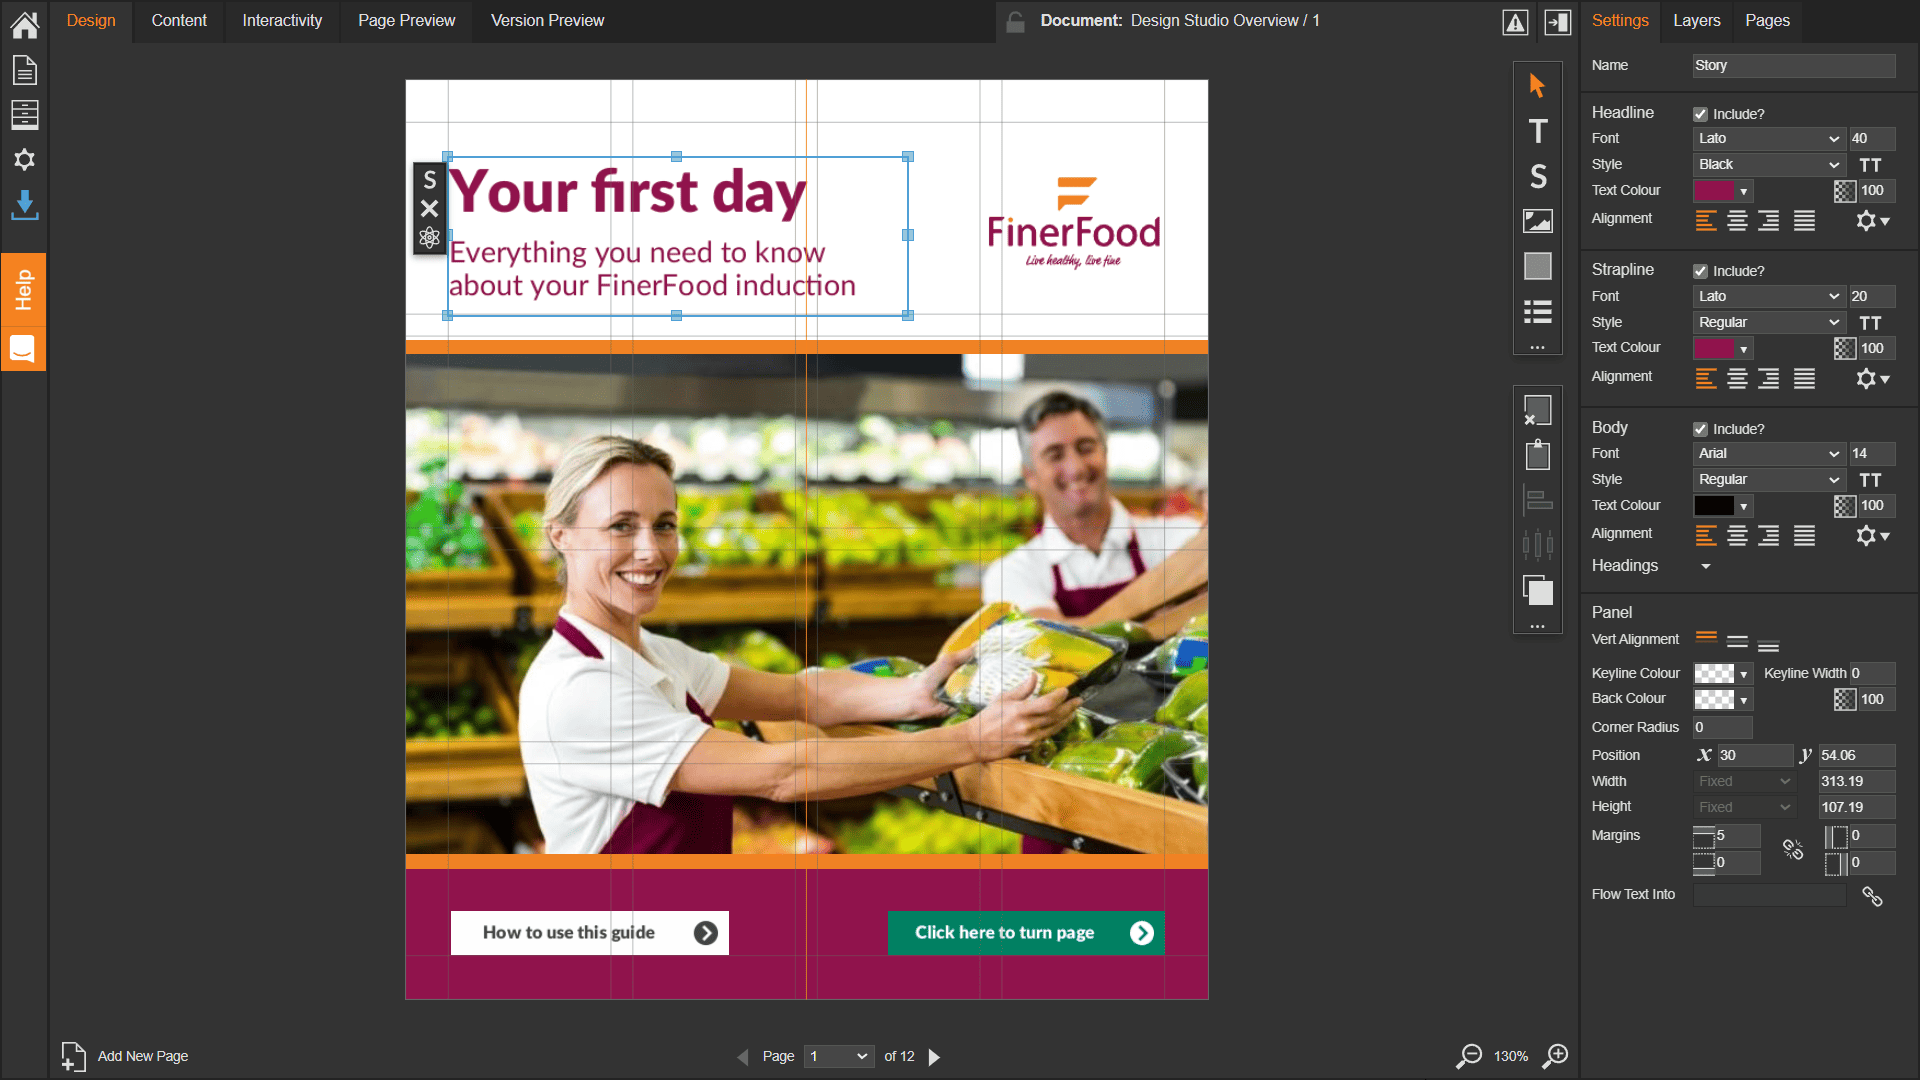
1. Design
In Design Mode, you have the flexibility to create and customise the layout of your document using various types of panels, such as Text, Image and Shape. Each panel can be tailored to meet your needs, allowing you to adjust settings like size, position, and style.
Recommended reading - Panel Types & Settings.
2. Content
Content Mode allows you to focus exclusively on editing the content of the panels of your page. For instance, you can change the text in a Story panel, but you won't be able to move or resize the panel itself.
This more focused approach ensures you can dedicate your full attention to refining the content of your document.
3. Interactivity
Create a vibrant digital experience for your readers by adding interactive elements to your document. Explore a variety of options, from videos and assessments to polls and image galleries, to bring your content to life!
Recommended reading - Adding Interactivity.
4. Page Preview
This feature can be used to review the content and interactivity of the page you are currently editing. As you develop the content of your document, you'll likely use this option more and more.
5. Version Preview
This option is ideal for reviewing all pages in your document along with any additional settings, such as security rule, style, and menu. Version Preview allows you to thoroughly test all elements, including mandatory interactivity and automation, ensuring you gain the same experience as your readers.
Recommended reading - Previewing.
Panels Palette
Seamlessly add new panels to your page, such as Text, Image or Shape. Simply click and drag to add a panel to your page. Each panel has its own Settings palette, enabling you to set various attributes such as colour, font and position.
Available panel types:
- Text.
- Story.
- Image.
- Shape.
- List.
Recommended Reading - Panel Types and Settings.
Modify Panels Palette
Use this palette to make adjustments to the panels on your page. You can easily delete, duplicate, or align multiple panels to achieve the desired look and feel of your document.
Recommended Reading - Modify Palette
Right-hand Palette
A selection of palettes are available to the right-hand side of the screen in TigerDesigner. This section will cover each palette and why they are important.
Settings
When you select a panel on your page, the Settings palette will become active, allowing you to adjust options such as font type, border colour, margin size, to tailor it to your design requirements.
Recommended Reading - Panel Types and Settings
Layers
All panels within your design will be displayed in the Layers Palette. This feature allows you to rename and rearrange the panels, as well as hide or lock them for better control.
Pages
Use this palette to see a quick view of all pages in your design or open the Document Builder.
The Document Builder is used to manage the pages in your document, allowing you to easily add, delete, duplicate, or rearrange them as needed.
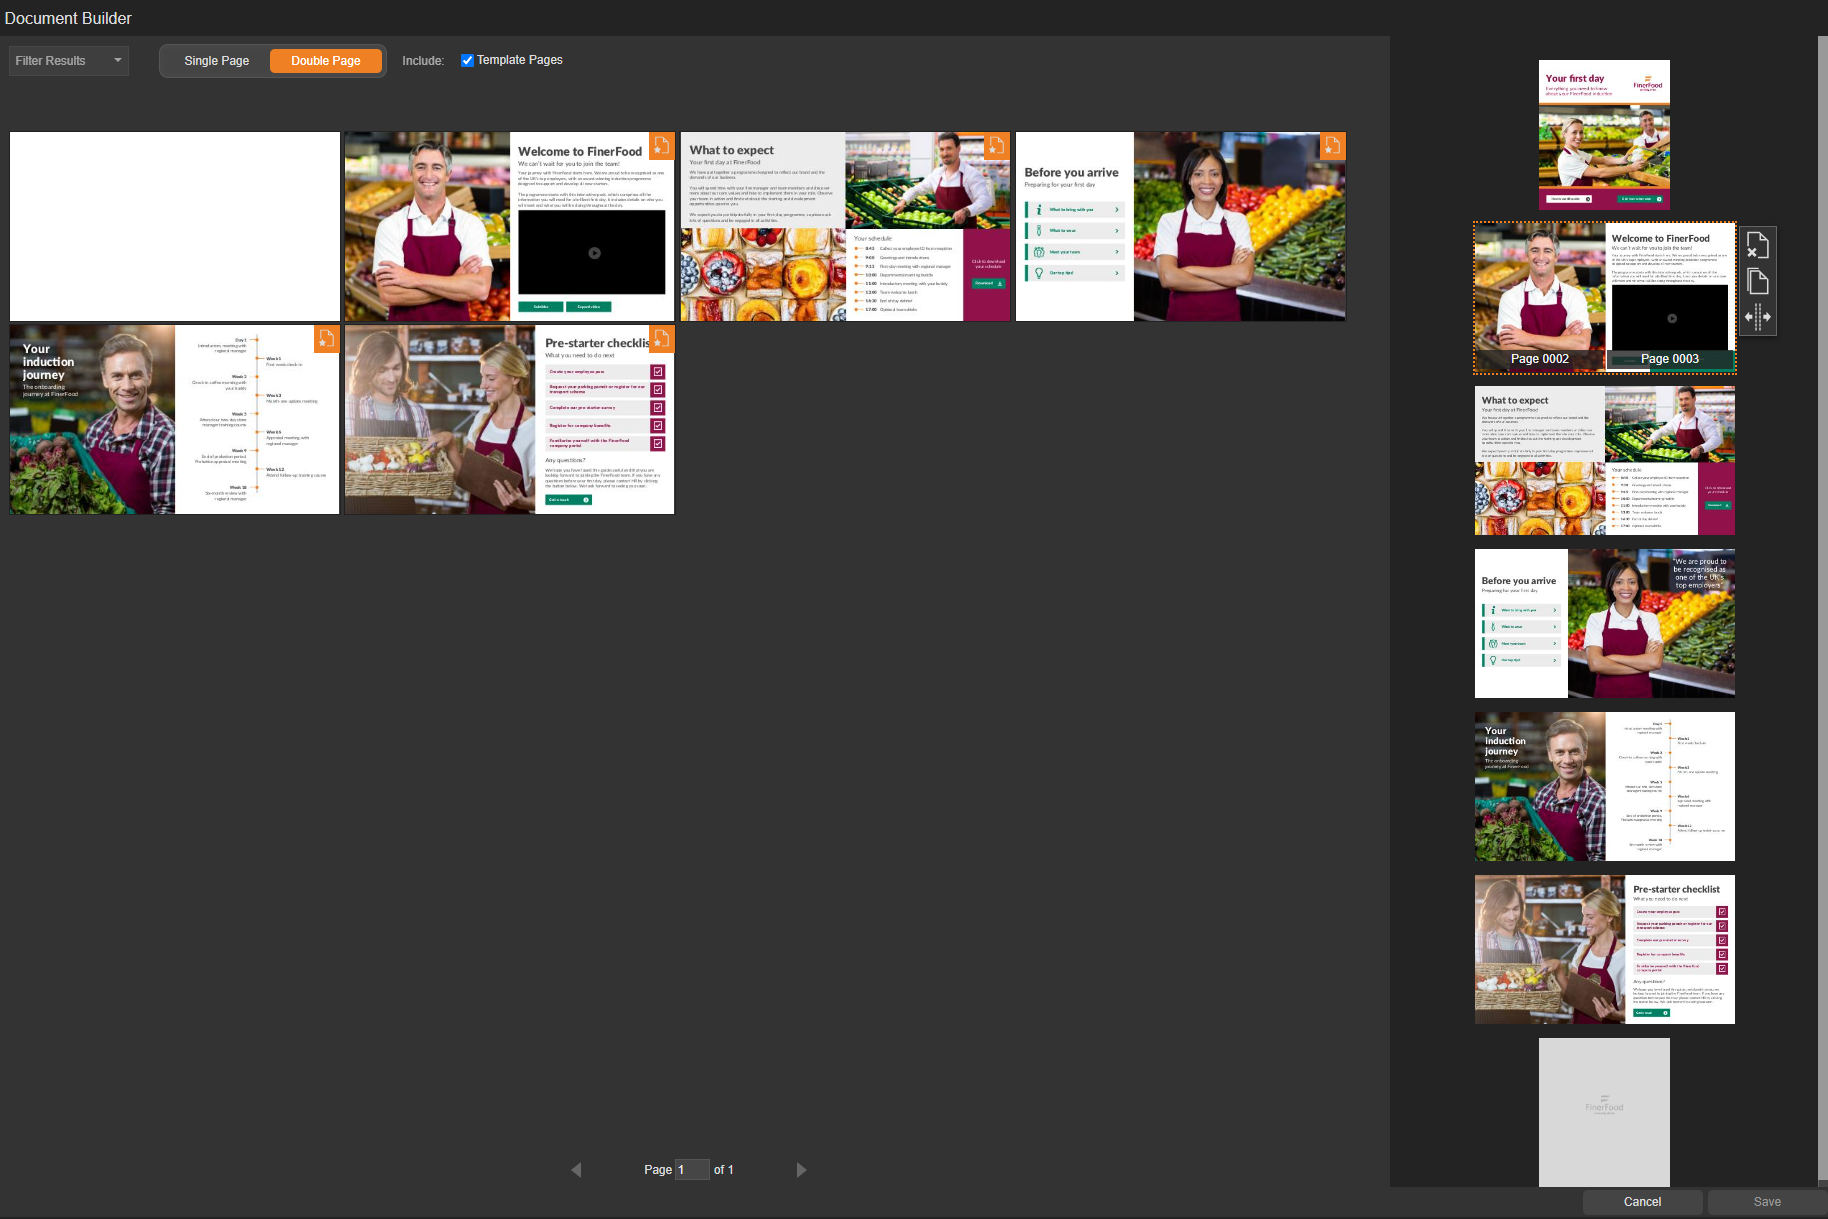
Recommended Reading - Fully Editable: Adding Pages