
Welcome to the beta testing phase of our upcoming Translations feature! If you would like to take part, please contact your Customer Success Manager.
Whether you’re reaching international audiences, collaborating with global teams, or simply working in a multilingual environment, having your content available in different languages can make a real impact. With our new translation tool, you can easily create multiple translated versions of the same document and streamline how you manage multilingual content.
We’d love your feedback as you explore - we'll follow up soon to see how you found the process, what worked well, and what could be improved!
For any issues or troubleshooting during your testing, please email support@pagetiger.com.
This page walks you through the steps for creating and reviewing translations - but that's just the beginning... more enhancements are on the way, including the ability to import and export translated content, translations for security rules and menus, and automatic language selection in view.
Ready to test? Let's get started!
1. Create native version
First, create a new document in your native language (for example, English) - this will act as the source version for all translations.
2. Create translated version
-
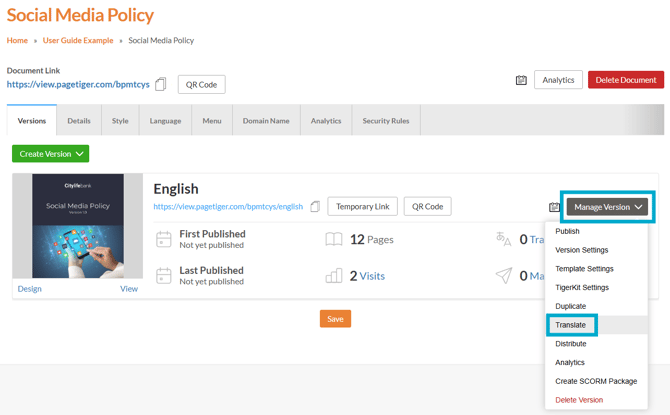
Select 'Manage Version', followed by 'Translate' for the version you wish to translate.
-
Choose your required language from 'Translate To' drop-down list.
-
If required, upload a Glossary file (must be .TSV file).
A Glossary File is a list of specific words or phrases that you want to exclude from translation or handle in a particular way - this ensure key terms, brand names and technical language are treated consistently across every version.
-
Select the 'Translate Version' button to create a new translated version of your document!

Any on-page text, interactivity (not including charts), accessibility content, videos and subtitles will be translated.
3. Review and approve translated version
Review
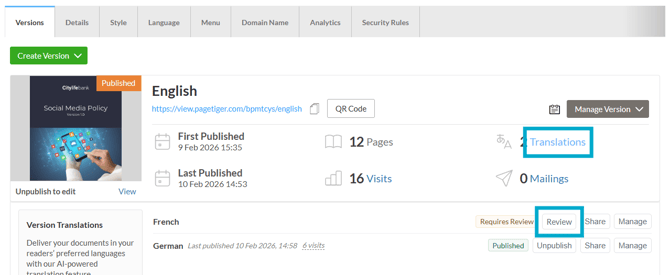
- Select the 'Translation' option to expand the translations drawer.
- Select the 'Review' button to open TigerDesigner.
Use the right-hand panel to review all content, focus on a specific section, or check any hidden sections.
- Once a section has been chosen, a pop-up box will display showing the original text alongside the translated version.
- From, here, either flag the items you want to revisit later, or edit them directly.
Approve
-
Happy with your changes? Select the 'Approve This Document' button and confirm that all reviews are complete!
-
After approving, you can either exit and return to the 'Manage Document' page or continue working on the content in TigerDesigner.
4. Next steps
-
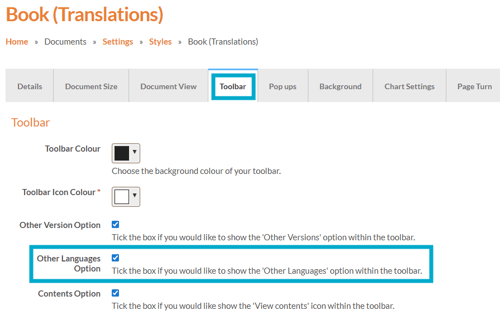
Add a Style to your document, ensuring the 'Other Languages Option' is selected.
- Publish and share the translated version(s).

When viewed, any translated versions will be available to select from the toolbar menu - simple select the 'Other Languages' option.